Welcome to AI Playground! This guide covers everything you need to know about setting up the application for the very first time. Since everything runs locally on your machine, getting started is completely straightforward — no account creation, no credit card, no subscription.
System Requirements
Before downloading, make sure your system meets these minimum requirements:
Windows
- Windows 10 (Version 1809 minimum) or Windows 11
- 4 GB RAM (8 GB recommended)
- 500 MB free disk space
- Internet connection for API calls
macOS
- macOS 10.15 (Catalina) and newer
- Apple Silicon (M1/M2/M3) and Intel
- 4 GB RAM (8 GB recommended)
- 500 MB free disk space
Linux
- Ubuntu 18.04+ (or any modern Debian/Fedora equivalent)
- 4 GB RAM (8 GB recommended)
- 500 MB free disk space
- GLIBC 2.28+
All Platforms
- Stable internet connection
- API keys for cloud providers
- Ollama (optional, for local models)
- Display resolution 1280x720+
1. Download and Install
AI Playground is distributed as a native desktop app for all major platforms. Choose your operating system below:
Windows
- Download the
AI-Playground-Setup-x.x.x-win-x64.exeinstaller from the download page ↗. - Double-click the installer. Windows may show a SmartScreen prompt — click Run Anyway.
- Follow the setup wizard: choose install location (default is
C:\Program Files\AI Playground) and select Create Desktop Shortcut. - Click Install and wait for completion.
- Launch AI Playground from the desktop shortcut or Start Menu.
macOS
- Download the
AI-Playground-x.x.x-mac-arm64.dmg(Apple Silicon) or (Intel) from the download page ↗. - Open the
.dmgfile and drag the AI Playground icon into your Applications folder. - If Gatekeeper blocks the app, run this in Terminal:
xattr -cr /Applications/AI Playground.app - Launch from Applications or Launchpad.
Linux
- Download the
AI-Playground-x.x.x-linux-x86_64.AppImagefile from the download page ↗. - Open a terminal and make it executable:
chmod +x AI-Playground-*.AppImage - Run it:
./AI-Playground-*.AppImage - Optionally, integrate it into your app launcher using a tool like
AppImageLauncher.
2. First Launch Walkthrough
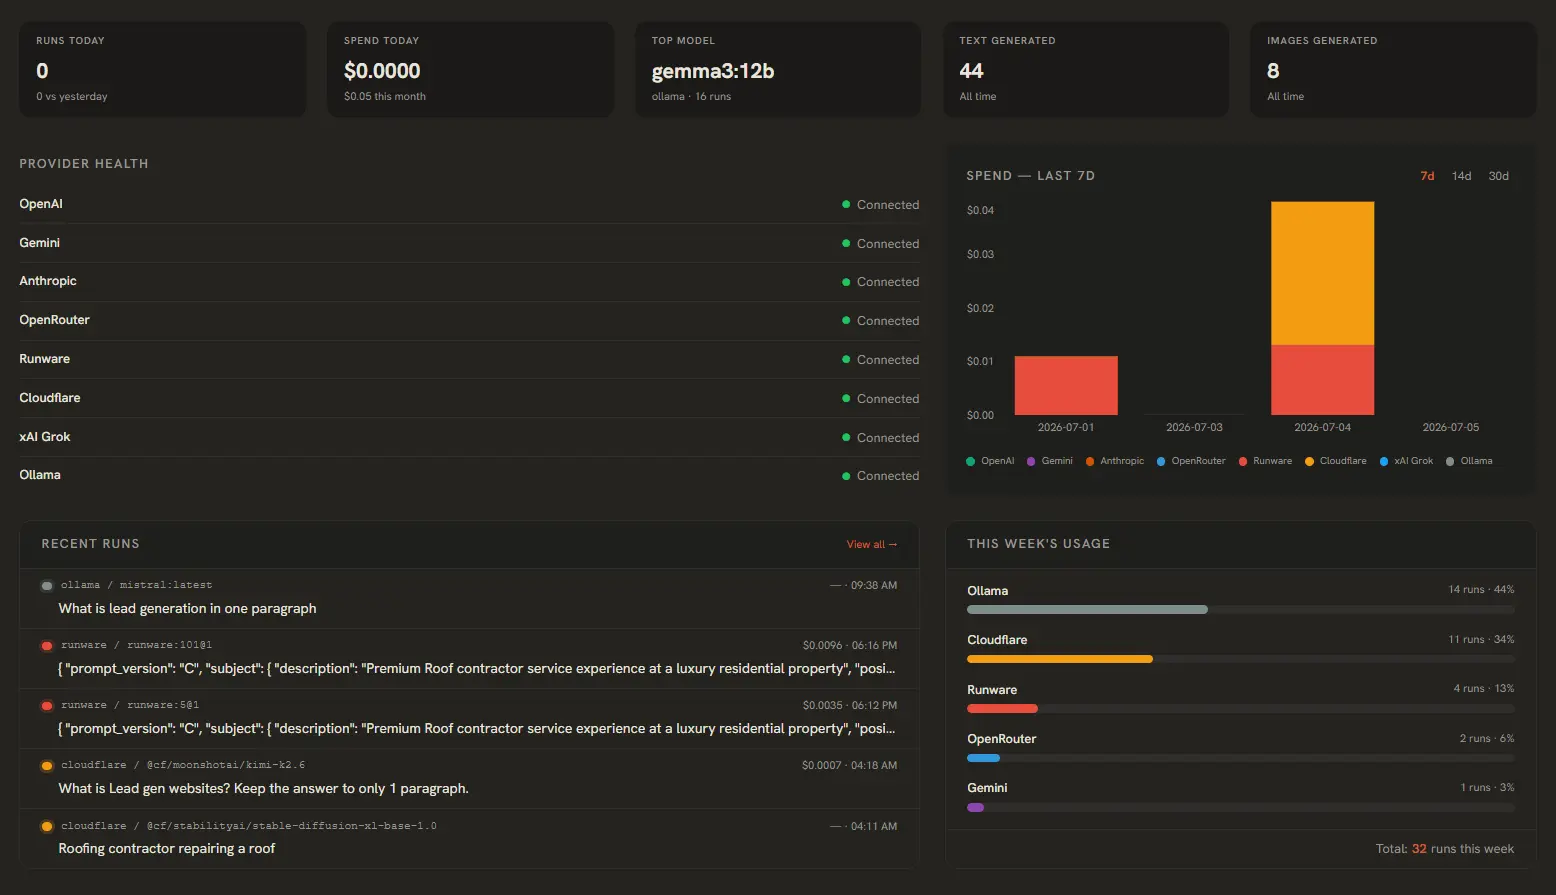
When you start the application for the first time, you'll land on the Dashboard. It will look mostly empty — that's normal. Here's what you'll see:
Dashboard Layout:
- Left Sidebar: Navigation menu. Icons for Text Generation, Image Generation, Compare, Prompt Library, API Keys, and Settings. Click any icon to switch views.
- Main Panel: Shows the Dashboard by default. Displays API Status cards, a Spend Chart, and Quick Navigation tiles.
- API Status Cards: Empty grey cards for each provider (OpenAI, Anthropic, Gemini, Ollama, etc.) — they'll turn green once you add valid keys.
- Spend Chart: A cost-tracking graph that becomes active after you start making API calls.
- Bottom Status Bar: Shows app version, active provider count, and quick settings toggles.
Before you can run prompts, you'll need to connect at least one AI provider. The next section explains where to get API keys.
3. Where to Get API Keys
AI Playground uses your own API keys. You'll need to sign up with each provider you want to use. Here's where to get them:
Privacy Note: All API keys are stored locally in the app's SQLite database. They never leave your machine or touch our servers.
| Provider | Where to Get Key | Free Tier? |
|---|---|---|
| OpenAI | platform.openai.com/api-keys ↗ | $5 free credit on signup |
| Anthropic | console.anthropic.com ↗ | No free tier (pay-as-you-go) |
| Google Gemini | aistudio.google.com/apikey ↗ | Free tier available |
| Cloudflare | dash.cloudflare.com/profile/api-tokens ↗ | 10k requests/day free |
| Runware | runware.ai ↗ | $5 free credit on signup |
| OpenRouter | openrouter.ai/keys ↗ | $1 free credit |
| AI/ML | aimlapi.com ↗ | No free tier (pay-as-you-go) |
| NVIDIA | build.nvidia.com ↗ | Free tier (rate-limited) |
| Hugging Face | huggingface.co/settings/tokens ↗ | Free tier available |
For local AI, Ollama doesn't need an API key at all — just install Ollama ↗ and run it in the background. See the Managing Providers guide for detailed setup instructions.
4. Running Your First Prompt
Once you've added at least one API key, you're ready to generate text. Here's how:
- Click the Text Generation icon in the left sidebar (the chat bubble icon).
- In the top dropdowns, select a Provider (e.g. OpenAI) and a Model (e.g. gpt-4o).
- Type your message into the chat input box at the bottom of the screen. Try something simple like:
"Explain what AI Playground does in one sentence." - Press the Run button (the play icon) or use the keyboard shortcut
Ctrl+Enter(Windows/Linux) orCmd+Enter(macOS).
The response will stream in character-by-character, just like ChatGPT. You can continue the conversation by typing follow-up messages — the full chat history is preserved.
Quick Tips:
- Stop generation: Click the Stop button (square icon) to halt a response mid-stream.
- Clear chat: Use the New Chat button to start a fresh conversation.
- Copy response: Click the copy icon on any response to copy it to your clipboard.
- Retry: Regenerate the last response by clicking the refresh icon.
5. Troubleshooting Common Issues
App won't launch
- Windows: Try running the installer as Administrator. Disable antivirus temporarily during install.
- macOS: If Gatekeeper blocks it, go to System Settings → Privacy & Security and click Open Anyway.
- Linux: Ensure the
.AppImageis executable (chmod +x) and FUSE is installed.
"No provider connected" message
- Open the API Keys / Providers panel from the sidebar and add at least one valid API key. See Managing Providers for help.
Blank screen on launch
- Try launching with the
--disable-gpuflag. On Windows, holdShiftwhile clicking the desktop shortcut and add the flag in the target path.
App is slow or unresponsive
- Close unused apps to free RAM. If you have many long chat histories, try starting a new chat. For persistent issues, check the Settings → Logs & Debugging section to view app logs.
Now that you're up and running, dive into the Text Generation guide to learn about system prompts, parameter tuning, and advanced features.